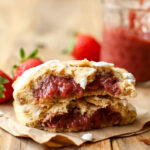
Ingredients
Scale
- 1 1/2 cup gluten-free flour (I used King Arthur’s GF Blend)
- 1/2 cup tapioca flour
- 1/4 cup coconut sugar
- 2 ripe bananas (chilled overnight in the fridge)
- 2 tsps baking powder
- 1 tsp vanilla extract
- 1 batch of my Easy Strawberry Banana Jam (or any jam you like)
Frosting
- 1 can of full fat coconut milk (chilled overnight)
Instructions
- In a large mixing bowl, combine the GF flour, tapioca flour, coconut sugar, baking powder, and vanilla.
- Add in the chilled banana and use your hands to cut it in and knead until you have a ball of slightly sticky dough. You may need to add a few more tablespoons of flour if it is too sticky.
- I suggest chilling the dough for 2-4 hours before rolling it out to make it easier to work with.
- Preheat the oven to 350F.
- Place the dough onto a sheet of parchment paper, cover with another sheet, and roll it out to 1/4 inch thickness. Peel off the top piece of paper, flip, and peel off the other piece just too loosen them both so it won’t stick later.
- Move the parchment paper and dough onto you baking pan. Cutting them out on the pan will save you having to transfer them later.
- Cut the dough into a rectangle. Cut the rectangle into 4 smaller rectangles.
- Dollop a couple of tablespoons of jam onto one side of each small rectangle.
- Fold the dough over and pinch the edges.
- Use the tines of a fork to crimp the edges.
- Bake for 20 minutes at 350F.
- For the glaze: Scoop out the cream from the can of coconut milk. Whisk, adding in the liquid from the can little by little to achieve a drizzle-able consistency.
- Or see other options in the post above.
- Cool then drizzle with glaze and enjoy!
